
How to install an anti-condensation membrane on the roof
Published on 17.07.2026 · Isoflect Insulation technical team
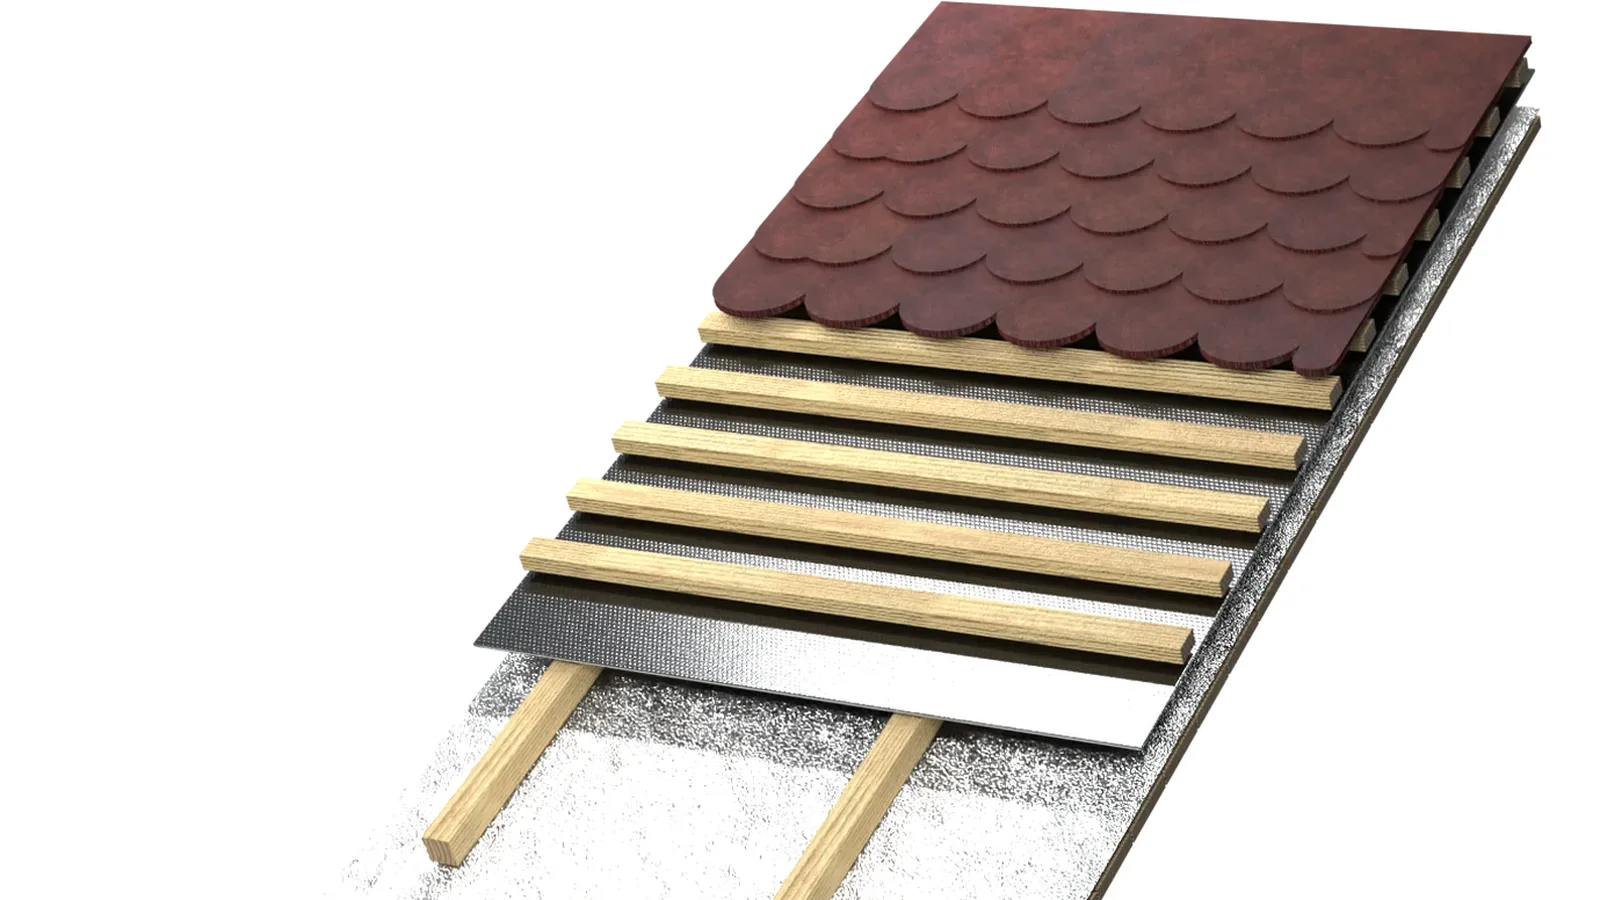
An anti-condensation membrane installed with the wrong side facing out, without sealed overlaps or without a ventilation space can turn a new habitable attic into a constant source of moisture. If you wish to know how to install an anti-condensation membrane, the basic rule is simple: water that accidentally reaches beneath the roof covering must be conducted to the outside, and vapour from the structure must be managed without blocking the proper drying of the roof.
Correct installation is not merely a matter of rolling out a membrane over the rafters. The type of membrane, the roof pitch, the type of roof covering, the insulation between the rafters and the details in vulnerable areas all matter: eaves, ridge, valleys, roof windows and pipe penetrations. A well-chosen system delivers certain and predictable performance for the structure, the thermal insulation and indoor comfort.
What the anti-condensation membrane actually does
The anti-condensation membrane is installed beneath the roof covering, on the outer side of the insulated structure. Its role is to stop water that has penetrated through the roof covering - wind-driven rain, blown snow or condensation formed beneath metal sheeting - and to direct it towards the eaves. At the same time, an open diffusion membrane allows water vapour from inside the roof to migrate towards the outside.
Do not confuse the anti-condensation membrane with the vapour barrier. The vapour barrier is installed on the warm side of the thermal insulation, towards the interior of the habitable attic, and limits the ingress of vapour into the insulating layer. The anti-condensation membrane works on the cold side, beneath the roof covering. In a habitable attic roof, the two products may form part of the same system, but they have different functions.
The choice of membrane depends on the configuration. A high-performance diffusion membrane is suitable for insulated roofs, since it helps the structure to eliminate residual vapour. For a metal roof covering, for areas with strong wind or for low pitches, carefully verify the mechanical strength, water resistance and installation conditions declared by the manufacturer. Not all membranes have the same minimum overlaps or the same compatibility with direct contact with the thermal insulation.
Preparing the roof before installation
Before the membrane is rolled out, the rafters must be straight, dry and free of edges or nail heads that could perforate the membrane. Timber with excessive moisture is not remedied by quickly covering it with a membrane. Moisture trapped in the structure may cause deformation, mould and reduced durability of the timber.
Measure the length of the roof pitch, the spacing between rafters and the areas with interruptions. Allow additional material for overlaps, valleys, the ridge and junctions. An estimate based solely on the flat surface area of the roof frequently results in a shortage of material precisely when the details that provide the greatest protection must be executed.
You will need an anti-condensation membrane, stainless or galvanised staples, sealing tape compatible with the membrane, a cutter, a tape measure and counter-battens. The counter-battens are essential: they permanently secure the membrane to the rafters and create the ventilation channel between the membrane and the roof covering. For sealing at penetrations, use dedicated sleeves or tapes, not general-purpose silicone applied directly to a dusty membrane.
How to install an anti-condensation membrane, step by step
Start at the eaves
The first strip is laid horizontally, parallel to the eaves, with an extension that allows water to drain towards the drip edge and the gutter. The membrane must not terminate behind the fascia board, where water may reach the timber. The exact detail depends on the eaves system, but the water path must be continuous and visible: from the membrane, to the drip edge, then into the gutter.
Observe the installation side indicated by the manufacturer. Many membranes have the printed face oriented outwards, but the marking on the product and the technical data sheet take precedence. Installing a membrane the wrong way round may affect water drainage or its diffusion behaviour.
Stretch the membrane evenly, but not as taut as a drumskin. A slight sag between the rafters may allow water to run off without stressing the fixing perforations. However, avoid ponding or large folds, as water and dirt may accumulate in these areas.
Overlap the strips correctly
The second strip is installed over the first, continuing from bottom to top up to the ridge. The overlap must follow the lines printed on the membrane or the value given in the technical documentation. In practice, the pitch, wind exposure and type of roof covering may require larger overlaps than the standard minimum.
On low-pitch roofs and in areas exposed to wind-driven rain, sealing the overlaps with a compatible tape is a sensible and safe measure. The tape reduces the risk of water driven under the roof covering penetrating between the membrane layers. Membranes with integrated self-adhesive strips simplify the work, but the adhesive must be applied to clean, dry surfaces and at the recommended temperature.
Temporary fixing with staples is carried out in the area that will subsequently be covered by the overlap or by the counter-batten. Do not fix the membrane at random in the middle of the field. Every unnecessary perforation is a potential path for water.
Install the counter-battens without delay
Once a section of membrane has been positioned, fix the counter-battens vertically, in the direction of the rafters. They press the membrane in place, protect the staple points and form the ventilation space beneath the roof covering. The horizontal battens required for the tiles, metal panels or other roofing system are installed over the counter-battens.
The ventilation channel must have an inlet at the eaves and an outlet at the ridge. If the air cannot circulate, the condensation beneath the roof covering is not removed effectively, regardless of how good the membrane is. Eaves grilles and ventilated ridge components must be protected against insects and the ingress of snow, without obstructing the airflow.
Treat the ridge, valleys and penetrations separately
At the ridge, the membrane is detailed according to the type of membrane and the ventilation system. Do not simply cover every opening with tape if the design requires air to be exhausted through the ridge. The roof covering and ridge accessories must maintain ventilation while limiting the ingress of water and snow.
Valleys concentrate large volumes of water and therefore require an additional strip of membrane before the main layers are installed. The membrane must follow the water path continuously, without open cuts or overlaps oriented against the direction of flow.
Around roof windows, chimneys, ventilation pipes and antennas, create a junction that directs water around the penetration, not behind it. Cuts are sealed with compatible tape or sleeves. For chimneys, also observe the fire safety clearances from combustible materials, in accordance with local codes and the manufacturer's instructions.
Errors that may compromise the roof
The most costly problems usually arise from seemingly minor details. A membrane left exposed to UV radiation for too long may degrade before the roof covering is installed. Overlaps that are too small allow water to infiltrate. The absence of counter-battens eliminates the necessary ventilation, and uncontrolled perforations reduce water protection.
Another error is using an anti-condensation membrane as a substitute for the interior vapour barrier. In a heated habitable attic, the vapour produced by cooking, showers and daily activities must be controlled on the interior side by an airtight layer with sealed joints and junctions. Otherwise, moisture may reach the thermal insulation wool, and the thermal performance declines precisely in the season when it is needed.
Do not install the membrane over a dirty or wet substrate, or one with elements that could perforate it. Likewise, do not assume that every membrane permits direct contact with the insulation. Always check the diffusion value and the instructions for the selected product. The difference between a highly vapour-permeable membrane and one with low diffusion changes the entire ventilation configuration of the roof.
Final check before the roof covering
Before installing the tiles or panels, check that all strips are oriented like scales: water must flow over the overlaps, never beneath them. Confirm continuity at the eaves, sealing at penetrations and the fixing of the counter-battens on every rafter. Inspect the roof from the inside as well, where possible, in order to identify perforations, tensioned areas or light visible through details.
For a habitable attic, treat the anti-condensation membrane as part of a complete system: a ventilated roof covering, thermal insulation suited to the available thickness, a vapour barrier sealed on the interior side, and the interior finish. Isoflect can assist in selecting a package compatible with the roof structure, so that each layer contributes to moisture control and thermal comfort.
A dry roof is not achieved with a single membrane, but with correct paths for water, air and vapour. If a detail is unclear before the roof covering is closed, it is worth checking it at that point - access is straightforward now, and the structure of the house remains protected for many years.
Not sure which Isoflect product suits you? See Reflectiva Roof Pro or open the package configurator to find out exactly what you need and in what quantity.